
|

|

|

|
|
|
|
|
|
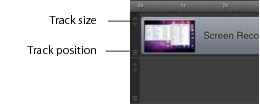
Clips in the timeline are placed sequentially in a single track, or separately on individual tracks, which allows you to overlap clips. Visual media placed on a track should be placed in relation to clips above or below it.Once a clip is placed in a track, you can drag the clip to adjust its start and stop times relative to the other clips.Tracks are organize by layer, with the topmost layer being the front layer, and succeeding tracks down in the timeline represent incrementally receding layers in the video.For example, a text box placed on a track above a video overlays the text on top of the video. If the text box is placed on the track below the screen recording, it is behind the recording and not visible.Figure 21. Use Track Controls to Adjust Track HeightTo adjust the height of the track, use the arrow buttons on the track. Click the down arrow to decrease the track height; click the up arrow to increase track height. This can make it easier to manage content in your timeline.To re-arrange a track’s position, select the track position handle and drag your track up or down in relation to the other tracks in the timeline.
|
Telestream, Inc.
www.telestream.net Copyright © 2012 Telestream, Inc. All rights reserved worldwide. February, 2012 | 80997 |