Table of Contents Previous Next Index

Using ScreenFlow Menus : Edit Menu

Edit Menu
This topic describes each item in the Edit menu.
Undo (Command-Z)
Reverts your last change. ScreenFlow offers an unlimited number of undo/redo actions (limited only by memory constraints). However, undo information is stored on a per-window basis. If you close a window and then reopen it, your undo information for that window is lost.
Redo (Shift-Command-Z)
Reverts your last Undo action.
Cut (Command-X)
Select Cut to remove these selected clips:
Copy (Command-C)
Select Copy to duplicate these selected clips:
 
Paste (Command-V)
Select Paste to add clips and text from the clipboard to your document:
Figure 57. Timeline just prior to a clip paste operation
Select Paste to add the clip on the clipboard to the timeline:
Figure 58. Timeline after pasting a clip from the clipboard
If the clip is pasted again, a new track is created for each new copy.
Paste Properties
Select Paste Properties to update the properties of the selected clip in the timeline with the properties of the current clip on the clipboard.
Paste Properties has the following sub menu items:
Video (Alt-Command-I). Pastes video properties into a video clip.
Audio (Alt-Command-A). Pastes audio properties into an audio clip.
Screen Recording (Alt-Command-S). Pastes screen recording properties into a screen recording clip.
Callout (Alt-Command-C). Pastes callout properties into a callout action.
 
Note: You can paste properties to multiple clips simultaneously; however, If you copy multiple clips with different properties and paste adjustments to another clip, which properties will be pasted is not predictable.
Paste and Match Style (Alt-Shift-Command-V)
Select Paste and Match Style to add text on the clipboard to your text box. Inserted text adopts the text formatting of the character immediately preceding the insertion point.
Delete (Backspace)
Select Delete to permanently remove the currently selected items. Delete does not place the item on the clipboard.
If you have marked in and out points, the segment between the in and out point is deleted for all clips, as shown below:
Figure 59. Mark In and out points on your timeline
Select Delete to remove all assets from the timeline between the in and out points:
Figure 60. Delete the assets between the in and out points
 
Note: To shift clips left to fill the hole created by the deletion, use Ripple Delete (Command-backspace), the scrubber handle, or right-click (Control-click) in the empty space and select Close Gap.
Select All (Command-A)
Choose Select All to highlight all clips in the timeline.
Deselect All (Shift-Command-A)
Choose Deselect All to deselect all clips in the timeline. This can also be done by clicking in an empty area of the canvas or timeline.
Split Clip (T)
Select Split Clip to convert each selected clip into two separate clips, splitting them at the current scrubber point, so that you can adjust the parts of the clip independently.
Figure 61. Timeline before splitting a clip
Figure 62. Timeline after splitting a clip
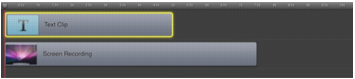
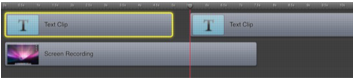
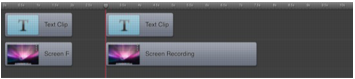
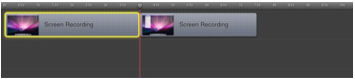
When splitting a clip, the previous clip name is retained on both clips. By default, each segment of a clip uses the name of the original media located in the Media Library. These segments can be renamed for convenience and clarity.
This action is applied with Command-T, Command-Shift-T, or simply T.
Detach Audio
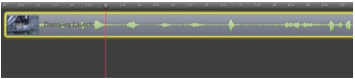
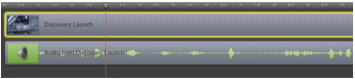
Select Detach Audio to remove the audio stream from the selected clip (visible as a green waveform through the center of the clip unless View > Show Audio Waveforms is unchecked), and create a new audio clip, creating an independent audio clip at the same point in the timeline.
Figure 63. Timeline just prior to a clip Detach Audio operation
ScreenFlow adds the audio to a new audio clip in the timeline:
Figure 64. Timeline after detaching audio from a clip
After the operation, a new audio clip, which contains the audio from the selected video clip, is added to the timeline. The previous video/audio clip is now video only.
Add Freeze Frame (Shift-Command-F)
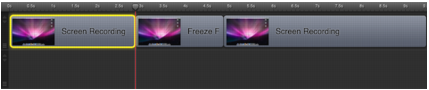
Select Add Freeze Frame to insert a freeze frame in the middle of a selected clip. First, the clip is split at the scrubber, then a two second freeze frame is inserted between the clips. The duration of the freeze frame can be set by dragging the edge of the clip, much like any other still image clip. The second half of the clip is moved to the right to adjust for the added clip.
Figure 65. Timeline just prior to a Add Freeze Frame operation
ScreenFlow adds two new clips to the timeline:
Figure 66. Timeline after detaching audio from a clip
This is useful for pausing your video while demonstrating or narrating.
Trim Front to Scrubber (W)
Select Trim Front to Scrubber to trim the front of the selected clips from the start of the clip up to the scrubber position.
Alternatively, you can adjust the left side of the clip by clicking the mouse just near the left edge of the clip (the mouse pointer changes to the drag cursor [left]) to indicate that you can resize the clip. Click and drag the edge of the clip to the right to trim the amount you want off of the front of the clip. This method is functionally equivalent to using the Trim Front to Scrubber command.
Trim End to Scrubber (E)
Select Trim End to Scrubber to trim the back of the selected clips from the end of the clip up to the scrubber mark.
Alternatively, you can adjust the right side of the clip by clicking the mouse just near the right edge of the clip (the mouse pointer changes to the drag cursor [left]) to indicate that you can resize the clip. Click and drag the edge of the clip to the left to trim the amount you want off of the back of the clip. This method is functionally equivalent to using the Trim End to Scrubber command.
Lock Clip/Unlock Clip (Alt-Command-L)
Select Lock Clip to lock selected clips to their positions in the timeline and cannot be moved. (When clips are locked, you cannot move other clips onto them to make transitions. Select again to unlock selected clips you have previously locked.
Add Starting Transition/Remove Starting Transition
Select Add Starting Transition/Remove Starting Transition to add transitions to the beginning of the selected clips. Apply again to remove the transition.
Add Ending Transition/Remove Ending Transition
Select Add Ending Transition/Remove Ending Transition to add transitions to the ending of the selected clips. Apply again to remove the transition.
Ripple Delete (Command-Backspace)
Select Ripple Delete to delete the content between the in and out points on all tracks of the timeline and shift all clips left to close the gap in the timeline.
Mark In Point (I)
Select Mark In Point to set the in point of a range in the timeline at the current point of the scrubber. When you create an in point without an out point, ScreenFlow automatically sets the out point to the end of the last clip in the timeline, and highlights the range in blue. In and out points can be used to delete entire sections of your timeline using the Ripple Delete command.
Select the in point (click on the line directly over the timeline scale) and drag it right or left to adjust its point on the timeline.
Shift-click on the timeline scale to set in and out points relative to the position of the scrubber.
Mark Out Point (O)
Select Mark Out Point to set the out point of a range in the timeline at the current point of the scrubber. When you create an out point without an in point, ScreenFlow automatically sets the in point to the beginning of the timeline, and highlights the range in blue. In and out points can be used to delete entire sections of your timeline using the Ripple Delete command.
Select the out point (click on the line directly over the timeline scale) and drag it right or left to adjust its point on the timeline.
Shift-click on the timeline scale to set in and out points relative to the position of the scrubber.
Clear In & Out Points
Select Clear In & Out Points to remove the in and out points you created previously.
Markers
The Markers menu item has the following submenu options:
Add (‘)
Select to add a marker to the timeline at the scrubber location.
If you export a ScreenFlow document as a QuickTime movie, chapter markers are placed at each named marker position in the movie when Add Chapter Track from Markers is checked.
Delete (Shift-~)
Select to delete the selected marker.
Delete All
Select to delete all markers in the timeline.
Goto Next (Shift-Up Arrow)
Select to move the scrubber to the next marker to the right on the timeline.
Goto Previous (Shift-Down Arrow)
Select to move the scrubber to the previous marker to the left in the timeline. You can also use the mouse to drag markers and adjust their position.
Special Characters (Alt-Command-T)
Displays the Characters window so that you can enter special characters in text fields.

Telestream, Inc.
www.telestream.net
Copyright © 2012 Telestream, Inc. All rights reserved worldwide.
February, 2012 | 80997

m_prefs_advanced