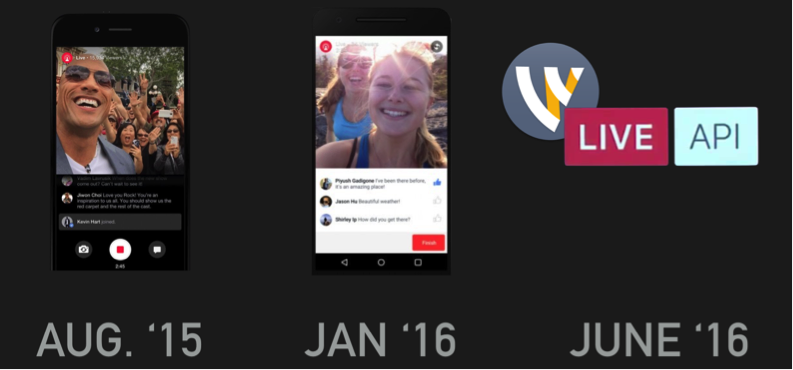
Facebook launched its live streaming service in August of 2015. At first, it was only available to select celebrities and verified profiles. Dwayne "The Rock" Johnson was among the first people ever to stream live on Facebook using his phone. Five months later, in January 2016, Facebook opened up the feature to all Facebook app users. Now, anyone using their mobile device and the Facebook application can stream live to Facebook.
Overview
The easiest way to stream to Facebook Live is using the Facebook App on your Phone – but it's not necessarily the best way. In June, 2016, Facebook announced the "Live API" which allowed any authorized 3rd party company, site or service to stream live content to Facebook. Telestream and Wirecast were among the very first launch partners for this service and we've been closely working with Facebook to put their robust live API to good use ever since.
Otherwise, read the rest of this web page and follow the step-by-step guide as we show you how to stream to Facebook Live using Wirecast.
If you’ve NEVER used Wirecast before, we’d recommend you start with this basic video tutorial series:
http://www.telestream.net/wirecast/resources.htm#collapse-wc12
Start the How-to-Stream Tutorial
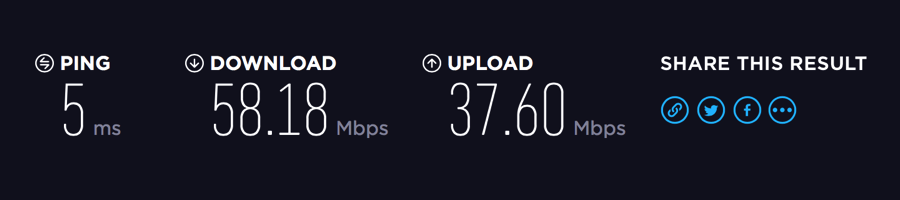
Make sure you have at least 4-5Mbps upload speed.
This is the single most important part of live streaming. If your upload bandwidth is insufficient, it’s a non-starter. Do not pass go, do not collect 200 likes. And remember it's the upload speed, not the download that matters. You could have a blazing fast 200Mbps download speed, but if your upload speed is below 4Mbps you won’t be able to live stream. Run a speedtest using www.speedtest.net or testmy.net from the computer (and location) that you intend to live stream from. In fact, run several tests and repeat them. If you can’t get a consistent 4-5Mbps+ upload speed, then you can’t stream to Facebook Live – at least not well, and not consistently. (In that event, you should just use your phone and the Facebook App for now.)
1 Step 1
2 Step 2
Select Your Destination.
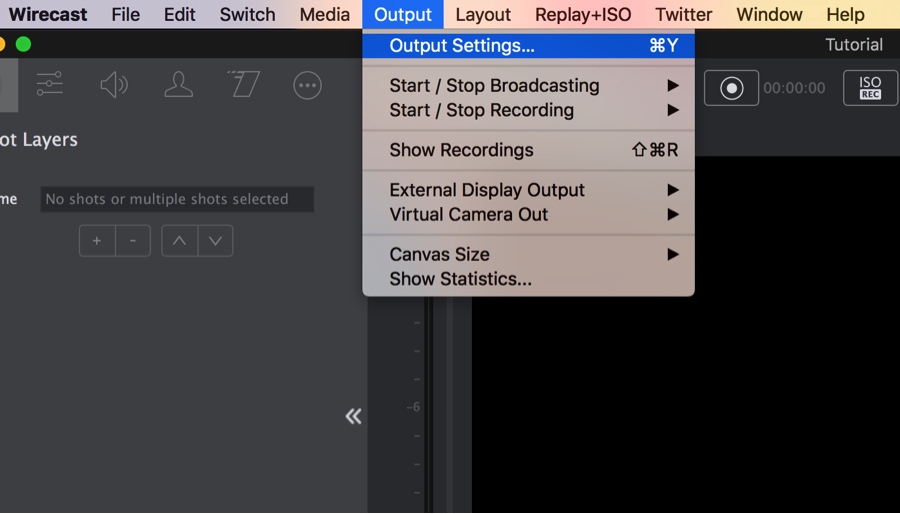
As with any other output destination in Wirecast (Youtube Live, Ustream, Twitch, record to MP4, etc.) you’ll find the Facebook Live destination in the "Output Settings" dialogue. To access this dialogue navigate to the menu bar and select "Output" and choose "Output Settings." You can also just use the keyboard shortcut "Command Y."
3 Step 3
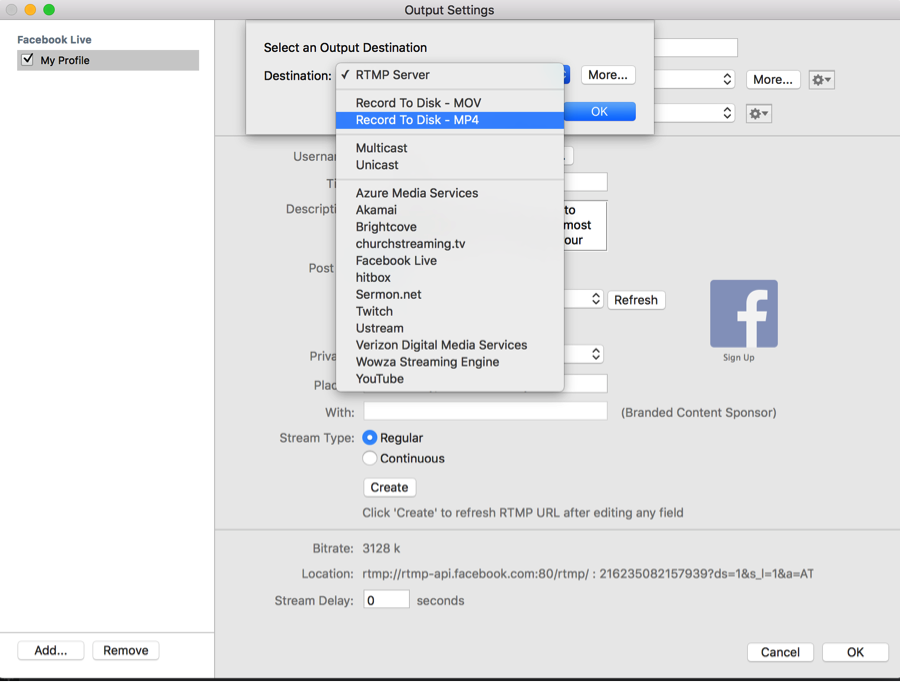
Choose Facebook as your destination.
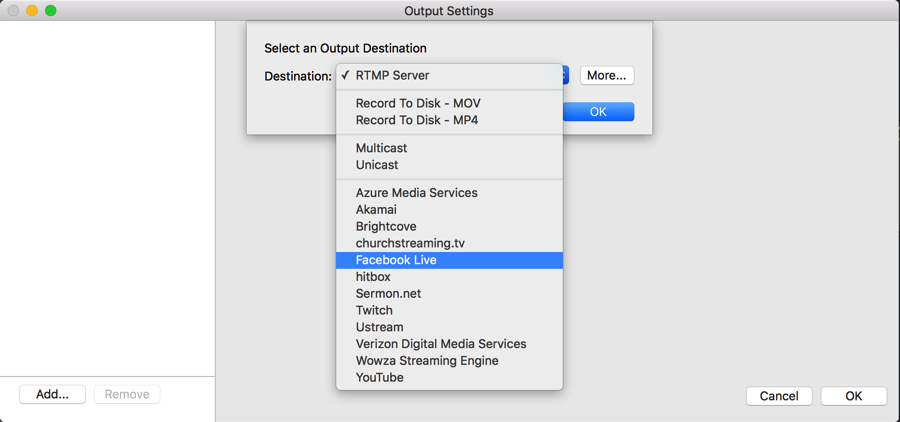
If you haven’t previously added any destinations, Wirecast will ask you to select an output destination. From the destination dropdown choose "Facebook Live." You’ll notice that internet streaming destinations (Youtube, Facebook Live, etc.) are organized in alphabetical order. If Facebook doesn’t appear on your list of destinations, then choose the "More" button next to the dropdown and it should appear on the more expansive list that it provides. You need to be using Wirecast 6.0.7 or later to see Facebook on the destination list.
4 Step 4
Login to your Facebook Account.
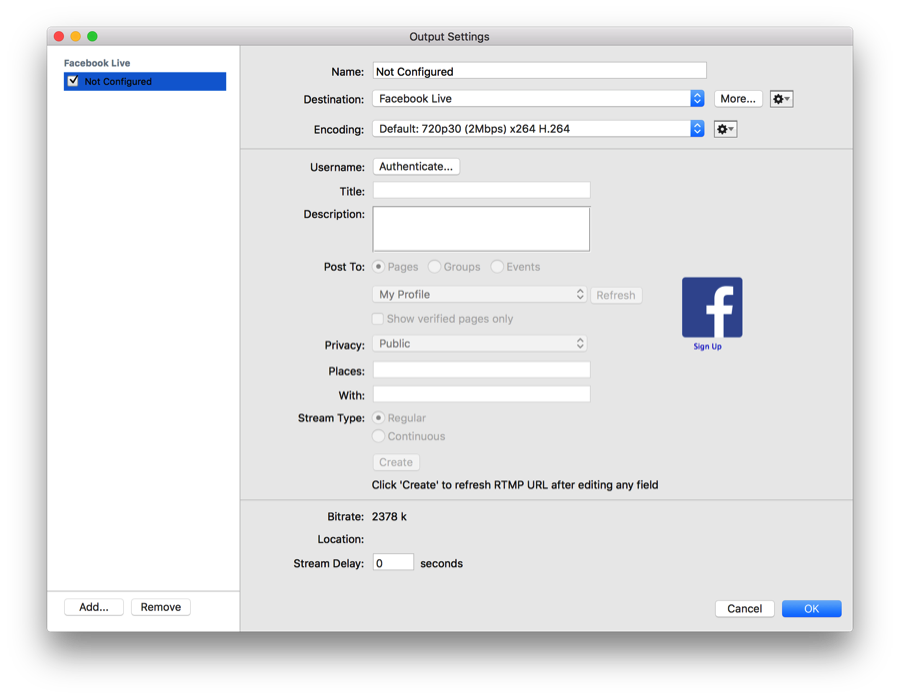
Next, the Output Settings dialogue will appear in all its glory. You don’t HAVE to enter a name for this destination, it’s perfectly acceptable to leave it as "Not Configured," but if you plan on using this document a lot, or adding other output destinations, then you’ll probably want to name it something memorable.
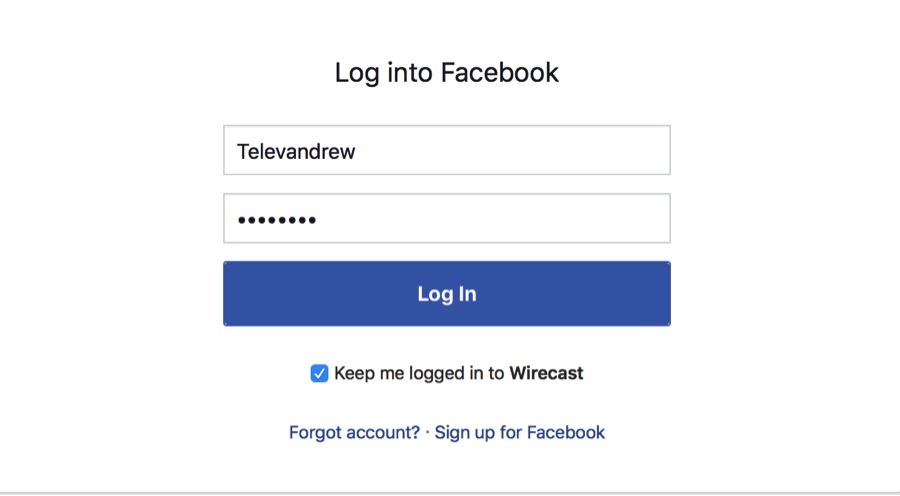
Click the "Authenticate" button and enter your user name and password for your Facebook account. If you plan on using this account regularly for live streaming, you may want to check the "Keep me logged in to Wirecast" box above the Login button.
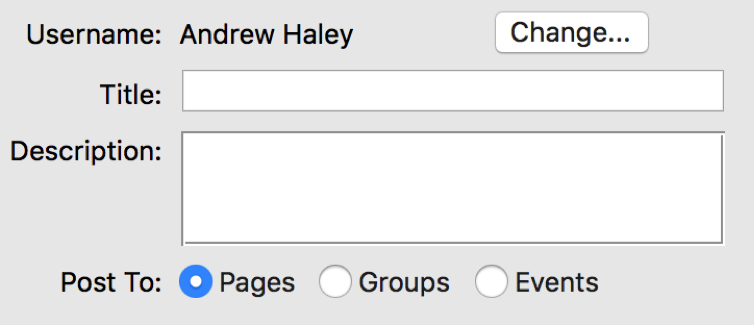
If you've logged in correctly, you should see your Facebook username appear in the Wirecast Output Settings dialogue.
5 Step 5
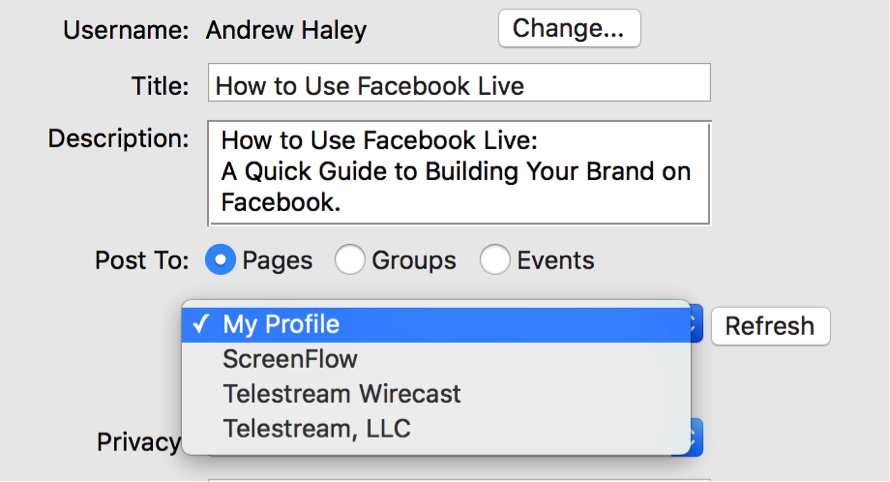
Enter a Title and Description and Choose Where to Stream.
Keep your title as short as possible and be descriptive. Titles will not be displayed when the live stream appears on your Facebook feed. They only appear in your videos page when a viewer clicks to watch the stream in full-screen.
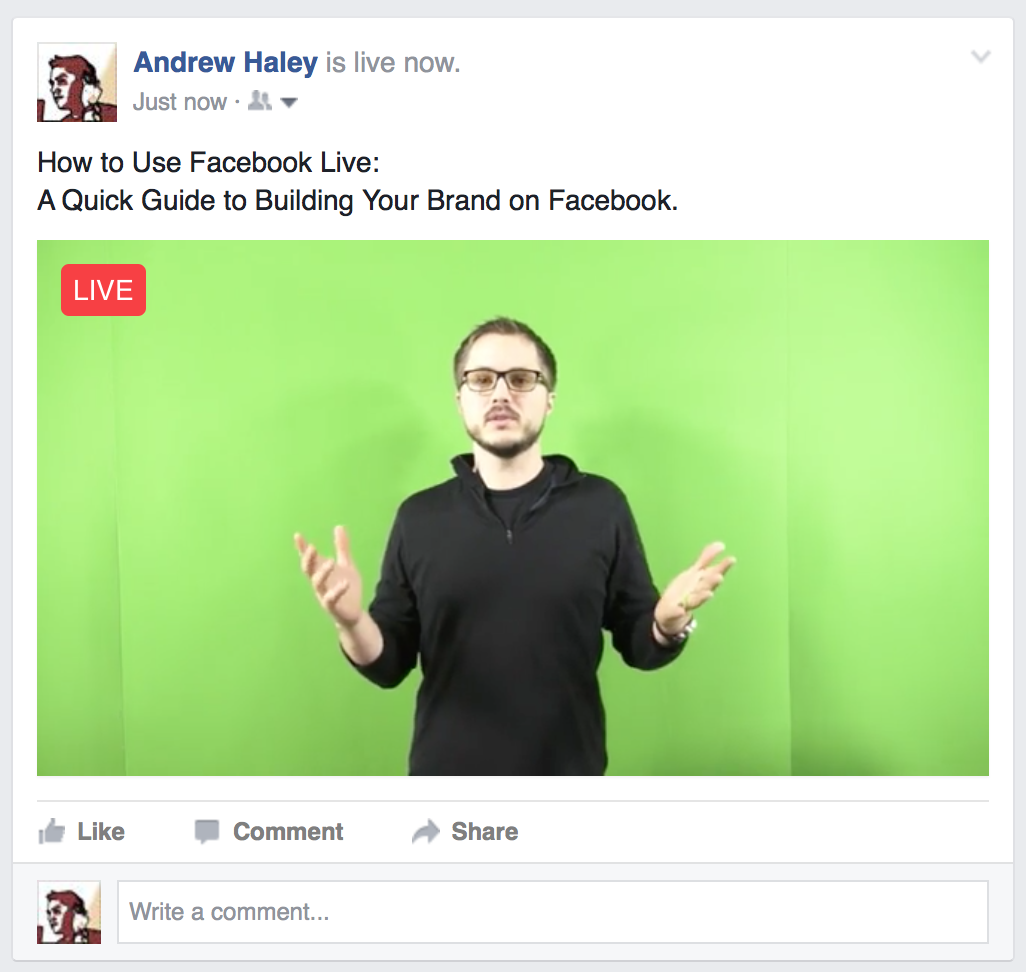
The first sentence or two of your description is, in a sense, even more important than your title. This is because it DOES appear above the video in your feed, and is the first text any other Facebook users will see when being exposed to your live stream. Having a sentence or two at the top that acts as a heading or sub-heading is a good way to start your descriptions.
Now choose the Page, Group or Event you would like to stream live to using the dropdown box below the "Post To" section. If you have a Verified Page (a page with a Blue Checkmark) you can use additional features like the "With" field which allows you to stream sponsored or branded content to Facebook Live.
6 Step 6

Set Your Privacy and (Optional) Enter Your Location.
Your Privacy, by default, is set to public. But you can restrict your broadcasts to be available only to your friends or to yourself.
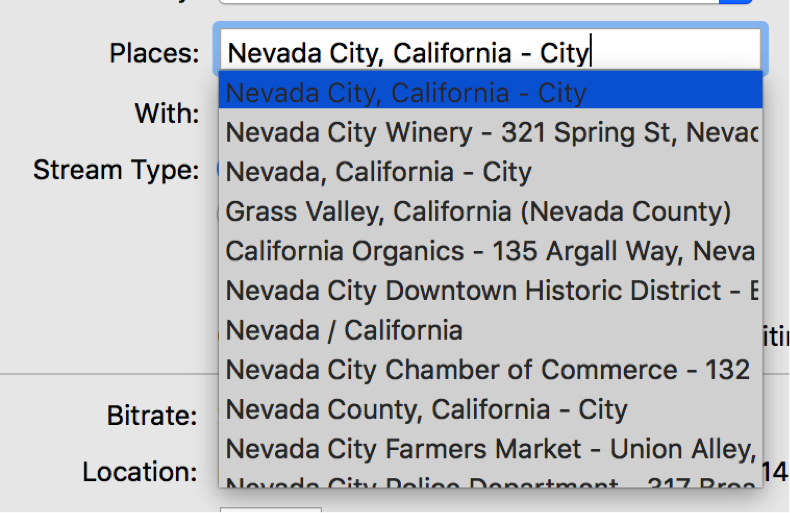
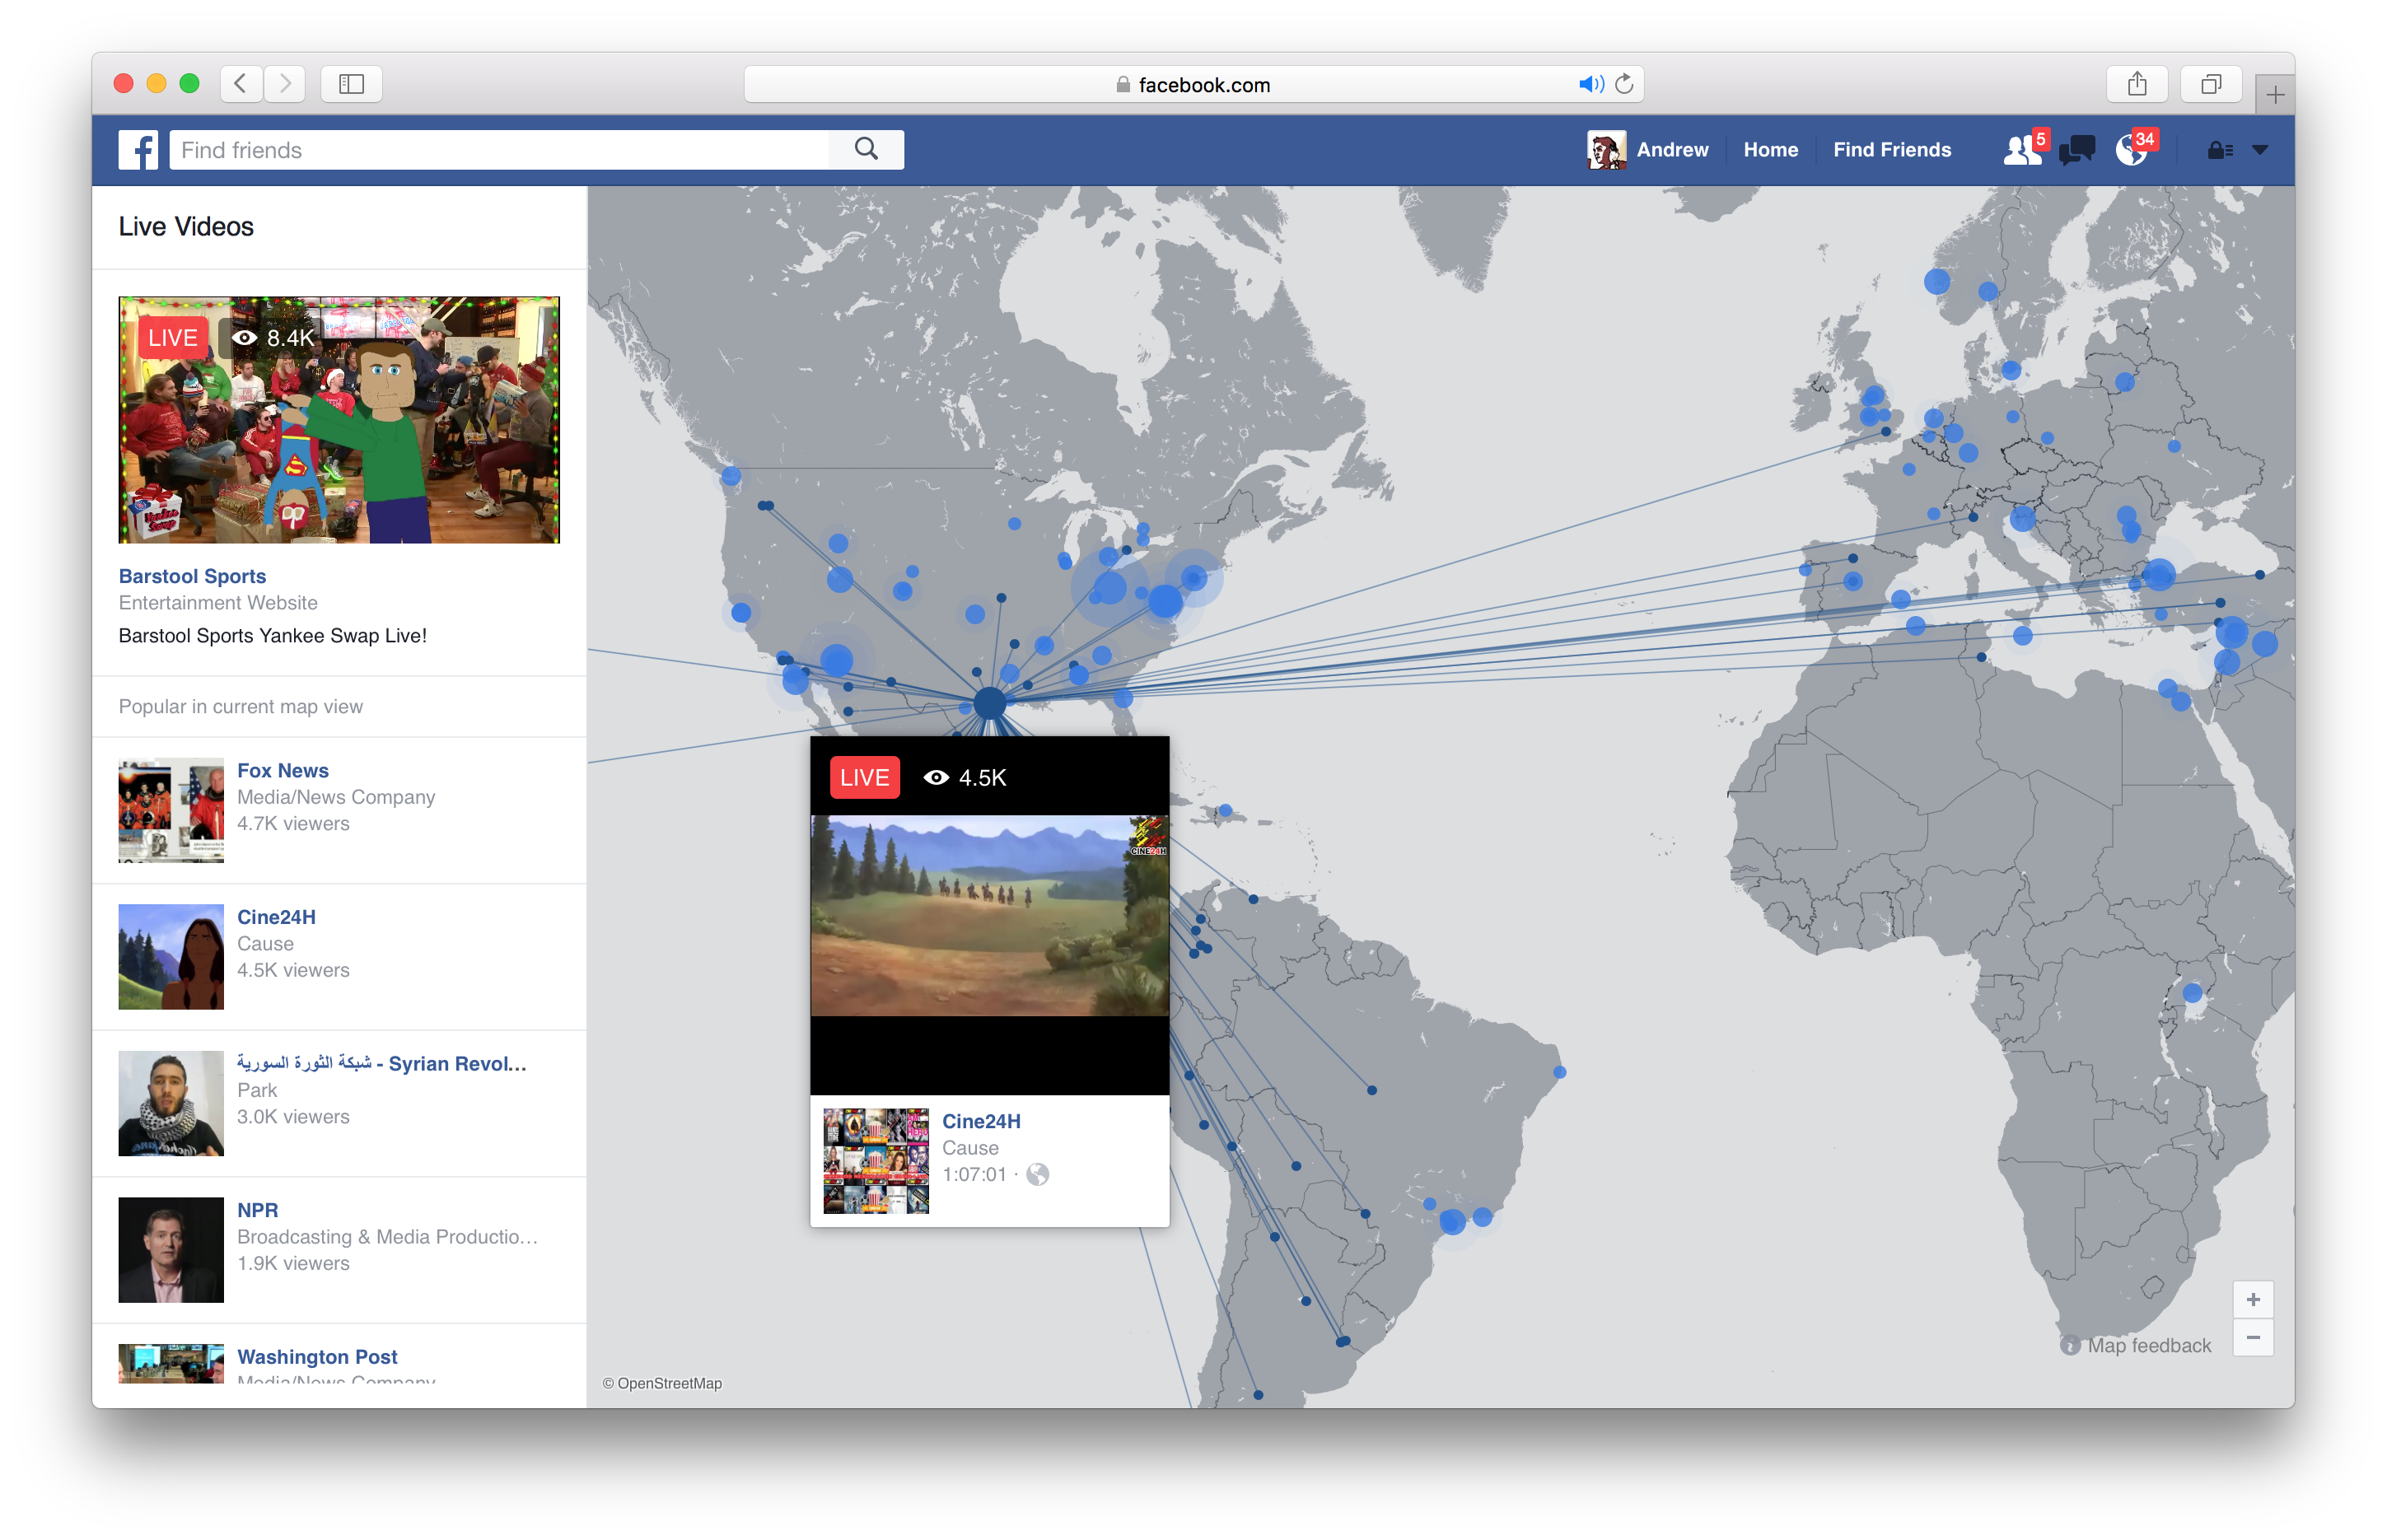
You don’t have to enter a location in the "Place" field. But if you do, the possible advantage is that this will allow your broadcast to appear on the Facebook Live Map. It is not guaranteed that all broadcasts will appear on the map, only Facebook knows the secret rules that govern that, but tagging a location for your broadcast increases your odds. The live map is one place that new or random viewers can discover your broadcast.
The list is smart (predictive) so it will find locations that other Facebook users have already tagged. But you can enter entirely new places if there are no matches.
7 Step 7
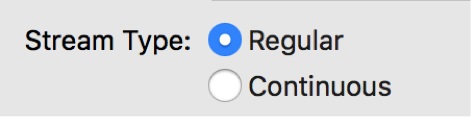
Choose Your Stream Type.
You can choose between a "Regular" stream type or a "Continuous" stream type. The difference is in the amount of time Facebook allows you to stream, and whether or not the stream is recorded on Facebook and available for on-demand viewing later.
"Regular" means you want Facebook to record the broadcast, and that you do not plan to stream longer than 4 hours consecutively.
"Continous" means you want to stream for an unlimited amount of time, but your broadcast will not be recorded for on-demand viewing. This is good for doing things like traffic cams, wildlife cams, etc.
8 Step 8

Encoding Settings.
I skipped this option above, because I didn’t want to start off with something as complex as encoding settings for a basic tutorial like this. And, in fact, the default settings should work very well assuming your computer has at least a quad-core processor.
9 Step 9
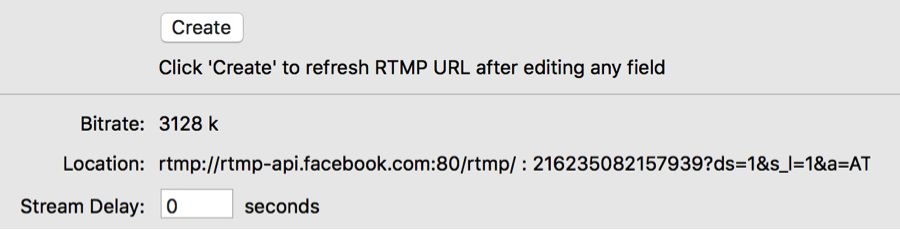
Click the "Create" button.
Once you have all your other settings in place, you can click "Create." This will send all the information you entered to Facebook and get your live stream ready to start. If all goes well, Facebook will return an RTMP address at the bottom of the Output Settings window.
Please note the warning. You should click "create" every time you change ANYTHING.
Also, if you so choose, you can enter a "Stream Delay." This will create a "buffer" on your computer that will add more delay between when something happens and when your audience finally sees it on Facebook. 99% of the time this is unnecessary, and will just use more computer resources. Facebook already has an inherent delay of between 5 to 10 seconds so adding more is usually not needed.
10 Step 10
Set up a Recording (optional) and Click OK.
If you are not doing a continuous stream type, Facebook will record up to 4 hours of your content. But you may want to record a local copy for later use or for upload to Youtube, etc. There have also been reports of a bug where Facebook users haven’t been able to get an HD version of their videos downloaded from their Facebook video manager, just SD versions.
If you do want to record a local copy, Click the "Add" button on the bottom left of the Output Settings. Then, choose "Record to Disk – MP4" from the destination dropdown.
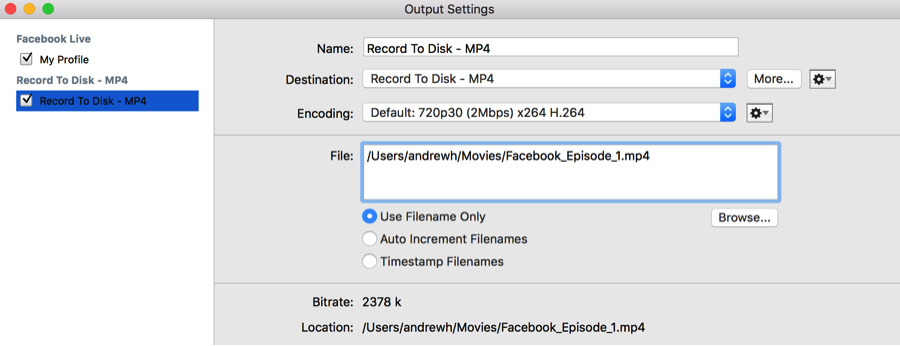
We don’t recommend recording in MOV unless you have a ridiculously large amount of storage, your broadcasts are extremely short, or you need to edit in Premiere or Final Cut Pro afterward.
The process of setting up a recording is very similar to what you’ve done above. Select an encoding size/quality (here you have many more options, but you can stick with defaults if you want to be safe).
Choose a location where you want to save your MP4 file and give it a name. There are some auto-naming options you can use if you like.
Whether you choose to add a recording or not, the last step in the Output Settings is to click "OK". Clicking OK tells Wirecast you want to keep all the settings and destinations you just configured. If you click "Cancel" you will have to redo the previous steps.
11 Step 11

Save and Stream (and Record).
We highly recommend you save your Wirecast document at this point. Wirecast has crash recovery, but it never hurts to be safe. If you’re really paranoid, you’ll save your document, then duplicate it and store the copy on another device.
Once you’ve saved it’s time to begin your live production. Click the "Record" button at the top of Wirecast. This will start your recording (if you added one).
Then click "Stream" and you will begin streaming to Facebook — it's time to smile!
12 Step 12

Watch Your Output Metrics.
If all is well, your stream and record buttons will be green. However, if there's trouble—they will flash yellow, orange or turn red. That's a bad thing.
One of the best things about Wirecast is that it gives you a wealth of information on how your stream is performing, how your computer is performing, and even, how many people are watching, commenting, and liking it on Facebook!
Make sure your frame rate stays solid and your system CPU remains at or below 70%. If either of those are fluctuating too much it means your system is probably not powerful enough to handle what you are asking it to do.
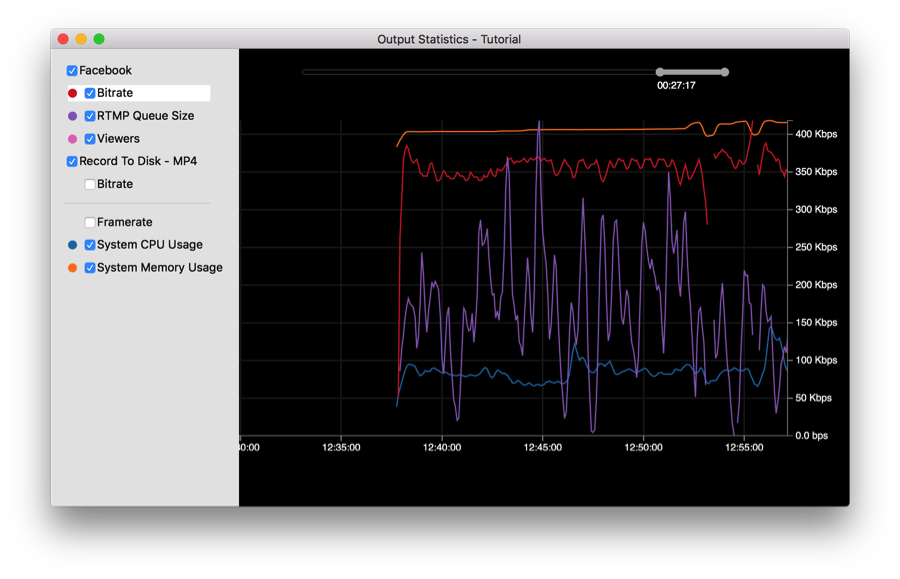
Another great place to get detailed information on how your streams are performing is the Output Statistics window. If you navigate to "Output > Show Statistics" you'll get much more of the information Wirecast has to offer in a handy real-time graph. You can even graph your viewers!
Now you know how to stream to Facebook Live using Wirecast. In our opinion, Wirecast is hands-down the best way to stream to Facebook Live since it offers the best possible integration with the Facebook Live API of any solution.