
|

|

|

|
|
|
|
|
|
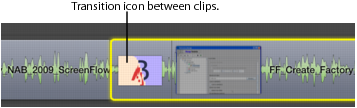
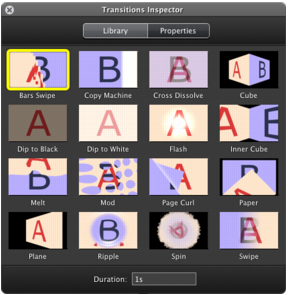
Transitions are applied to a clip to create a smooth progression into, out of, and between clips. Transitions can only be added to clips in the same track.The default duration of a transition is one second. You can expand or contract the duration by moving the thin line on the inside portion of the transition.Select a clip and select Edit > Add Starting Transition to add a transition to the front of the clip or Edit > Add Ending Transition to add a transition to the end of the clip.Create transitions between two clips by dragging one clip over an adjacent clip. The section where the two clips overlap is the transition.Figure 26. Transitions Inspector WindowYou can also select a transition effect and click the Properties button to alter properties (width, height, color, angle, opacity, etc.) specific to the selected transition effect, as appropriate.Transitions are applied to audio clips in the same manner as images. However, since there is no visual content in an audio clip, the transition is a volume transition. Starting and ending audio transitions fade in/fade out; overlapping transitions fade from one clip to the other simultaneously.
|
Telestream, Inc.
www.telestream.net Copyright © 2012 Telestream, Inc. All rights reserved worldwide. February, 2012 | 80997 |